Creating Elegant Beads and Pearls
A range of three cutters that help you to create pretty and elegant cake decorations for all types of occasions.
-
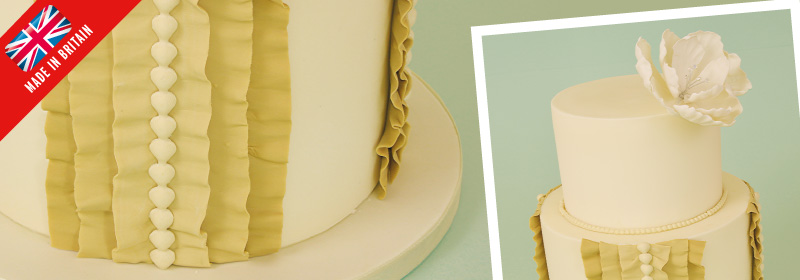
Sugar beads and pearls create a wonderful border, accessory or feature for any celebration cake. The beads can be made from a range of edible and non-edible materials including: Sugarpaste (Rolled Fondant), Flower paste (Gum Paste). Mexican paste, Pastiliage, Almond Paste and Modelling Chocolate.
-
FMM Sugarcraft Bead Cutters
-
- FMM Bead Cutter No. 1 (9mm)
- FMM Bead Cutter No. 2 (4mm)
- FMM Bead Cutter No. 3 (Teardrop)
-
-
Basic Techniques
The choice of paste and chosen finish will determine if the cutter requires any preparation.
-
- Any paste that contains natural oils eg; Almond Paste, may not require the inside of the cutter to be prepared in any way. Although a pearl colour can be used to create a lustre finish.
- All dry pastes eg; Sugarpaste or a blend of pastes, need the inside of the cutter to be brushed with either cornfl our, icing sugar or while vegetable fat to obtain a natural finish. Pearl colour can be added during preparation or when the beads have been moulded.
-
-
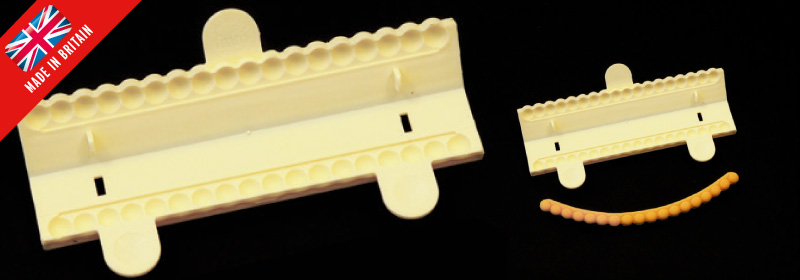
Bead Cutter No. 1 (9mm)
This cutter makes beads ideal for trimming the bottom edge of a cake, creating a simple but stylish border.
-
-
- Mould a piece of paste into a smooth, even, sausage shape. Use the cutter as a guide to the thickness. The paste only needs to fit in the diameter of the beads, approx. 9mm.
- Place the paste across the length of one side of the inside of the bead cutter.
- Close the cutter and press firmly.
- Open the cutter and trim the paste with a knife along the guideline.
- To release the beads, hold the cutter on one end and gently lift them out from the top.
- Secure in place with edible glue. To achieve the best finish when joining lengths of beads together it is essential you have a clean cut end and that the ends – as well as the back – are glued and secured into place.
-
-
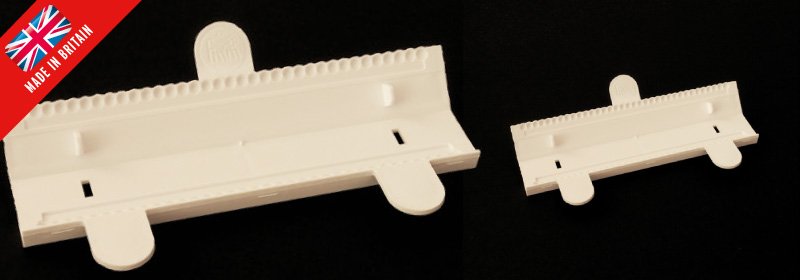
Bead Cutter No. 2 (4mm)
This cutter makes beads ideal for trimming the bottom edge of a cake, creating a simple but stylish border.
-
-
- Mould a piece of paste into a smooth, even, sausage shape. Use the cutter as a guide to the thickness. The paste only needs to fit in the diameter of the beads, approx. 9mm.
- Place the paste across the length of one side of the inside of the bead cutter.
- Close the cutter and press firmly.
- Open the cutter and trim the paste with a knife along the guideline.
- To release the beads, hold the cutter on one end and gently lift them out from the top.
- Secure in place with edible glue. To achieve the best finish when joining lengths of beads together it is essential you have a clean cut end and that the ends – as well as the back – are glued and secured into place.
-
-
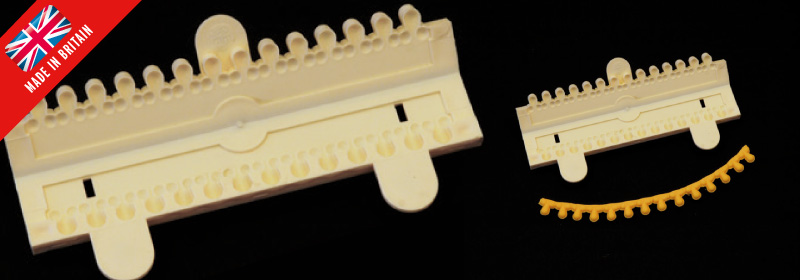
Bead Cutter No. 3 (Teardrop)
This cutter makes beads ideal for trimming the bottom edge of a cake, creating a simple but stylish border.
-
-
- Mould a piece of paste into a smooth, even, sausage shape. Use the cutter as a guide to the thickness. The paste only needs to fit in the diameter of the beads, approx. 9mm.
- Place the paste across the length of one side of the inside of the bead cutter.
- Close the cutter and press firmly.
- Open the cutter and trim the paste with a knife along the guideline.
- To release the beads, hold the cutter on one end and gently lift them out from the top.
- Secure in place with edible glue. To achieve the best finish when joining lengths of beads together it is essential you have a clean cut end and that the ends – as well as the back – are glued and secured into place.
-
-
Tips
-
- If too much paste is used the cutter will not close properly. It is better to reduce the thickness of paste rather than force the cutter.
- When making several lengths of beads it is best to prepare the sausage shape of paste, before dusting the cutter. This gives it time to settle and also allows the air to naturally remove any stickiness.
-