Making a Vintage Hat Box Cake
This original vintage hat box cake shows just how imaginative you can be using the FMM multi ribbon cutter.
-
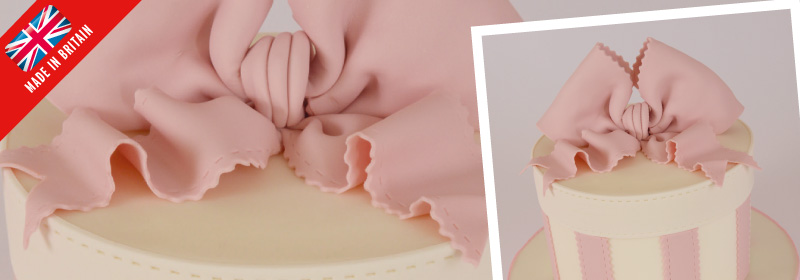
The FMM Multi Ribbon Cutter
This versatile cutter will create ribbons from 3mm to 50mm wide, with a choice of plain or wavy line edging, plus the option of including stitches. This cake is extremely simple to make, yet so pretty with its distinct ‘vintage’ feel.
-
Equipment you will need
-
- FMM Multi-ribbon tool
- 6” round sponge cake
- 9” round cake drum
- Ivory sugarpaste
- 50/50 mix of sugarpaste and flower paste in ivory and dusky pink
- Dusky pink flower paste
- Royal icing
- Non-stick rolling pin
- Brush & edible glue
- Cling film
- Sharp knife
- Pink ribbon
-
-
Preparation
-
-
- Cover the cake drum with ivory sugarpaste and set aside to dry.
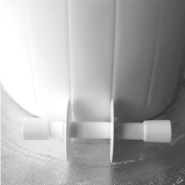
- Cover the cake with ivory sugarpaste and transfer to the cake drum, securing with royal icing. Set up the multi-ribbon tool with two plain cutting wheels, with one large spacer in between. Hold at the base of the cake and run the tool upwards to leave two lines. Place one of the wheels into one of the previously marked lines and repeat until all the sides of the cake are marked. These will act as guidelines for the stripes.
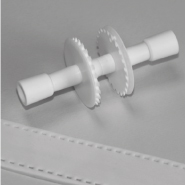
- Roll out a long strip of the ivory sugarpaste/flower paste mix to around 2mm thick. Using the multiribbon tool at same setting, with the addition of two stitching wheels (positioned on the inside of the plain wheels), cut a long strip and add the strip to the top of the cake to form the rim of the hat box, securing with edible glue. Use the top edge of the cake as a guide as you attach.
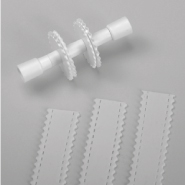
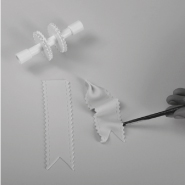
- Using the multi-ribbon tool with two wavy cutting wheels and two stitching wheels with one large spacer in between, cut another long strip of the dusky pink sugarpaste/ flowerpaste mix. Measure the distance from the base of the cake to the base of the strip at the top of the cake. Cut several strips from the paste at this length. Add the strips to the sides of the cake, using the marked lines as a guide.
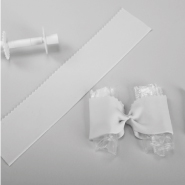
- To make the bow, set up the multi-ribbon wheel with one wavy cutting wheel and one plain cutting wheel at the widest setting (using all spacers). Roll out the pink flowerpaste to around 2mm thick and cut a strip 20cm long. Fold over both ends to meet in the middle, using edible glue to secure. Carefully pleat the centre and turn over. Cut a small rectangle from the paste, pleat and wrap around the centre. Insert cling film through both ends and leave to dry.
- For the tails of the bow, cut a strip of the pink flowerpaste using the multi-ribbon tool with two wavy cutting wheels, two stitching wheels (positioned on the inside of the wavy wheels), and one large and one small spacer in between. Cut two lengths around 10cm long and cut a ‘V’ at one end of each. Use the end of a paintbrush to add movement. Secure to the top of the cake with a little royal icing and position the bow on top. Finish the cake drum with pink ribbon.
-