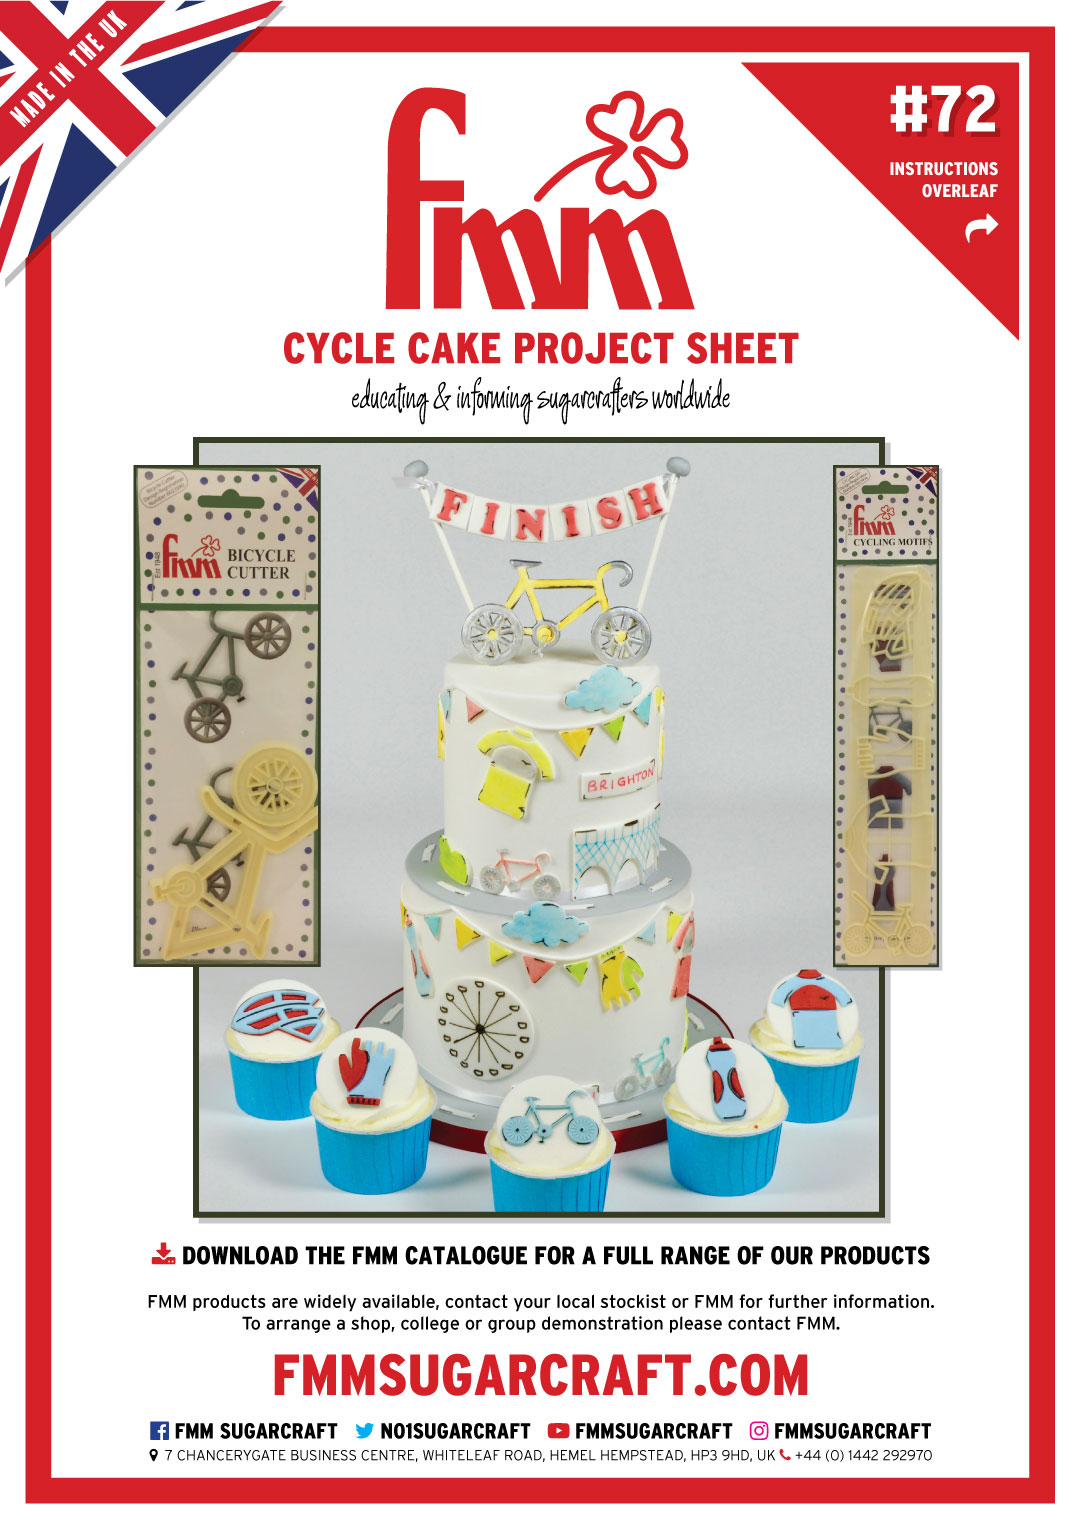
How to make a Cycle Cake
Equipment You Will Need
- FMM LARGE CYCLE TAPPIT SET
- FMM FLUFFY CLOUDS
- FMM ESSENTIAL SHAPES
- FMM GEOMETRICS SET
- FMM ART DECO ALPHABET & NUMBERS UPPERCASE
- FMM DAB-A-DUST (IF REQUIRED)
- NON STICK MAT & NON STICK ROLLING PIN
- WHITE, RED & GREY MODELLING PASTE
- WHITE MODELLING AND FLOWER PASTE
- MIX (OR GUM PASTE)
- WHITE FONDANT
- WATER & PAINTBRUSH (OR EDIBLE GLUE)
- 1 X 2 TIER CAKE (6” X 5” & 8” X 5”) COVERED IN WHITE FONDANT WITH GREY FONDANT ON TOP OF BOTTOM TIER
- 11” CAKE BOARD COVERED IN GREY FONDANT EDGED WITH RED RIBBON
- BLUE, RED & BLACK EDIBLE PEN
- EDIBLE COLOUR DUSTS ORANGE, RED, BLUE, YELLOW, SILVER AND GREEN MIXED WITH CLEAR ALCOHOL OR EDIBLE PAINT
-
- ROYAL ICING & 2 LOLLY STICKS
- THIN WHITE RIBBON
- KITCHEN KNIFE (SMALL)
Hints & Tips
- Always read the project sheet in full before starting your cake!
- To make your own modelling paste, add a little tylo to your fondant.
- Allow the modelling paste shapes to sit and firm up for a short time before attaching to your cake.
- If your modelling paste is sticking to your tools or mat use your FMM Dab-a-Dust for dusting with cornflour or icing sugar.
TO MAKE THE DECORATIONS – REFER TO CAKE PHOTOGRAPH
- Roll out white modelling paste and cut out the following: a) 2 bikes, 2 cycling t-shirts, 2 water bottles and 2 cycling gloves using the cycling tappit; b) 4 fluffy clouds (shape of choice); b) 16 triangles (third largest) and 14 triangles (second largest); d) 12 squares (third largest); e) The London Eye – Cut out a large circle using the large circle cutter; f) The Bridge – Cut out a large rectangle using the kitchen knife and use the large oval to cut the arches in to it. g) Cut out 2 rectangles to make the London and Brighton signs with your kitchen knife. h) Cut out 12 small rectangles with the kitchen knife to make the road markings. (SIT DECORATIONS TO ONE SIDE TO DRY A LITTLE)
TO MAKE THE BIKE TOPPER
- Roll out white modelling/flower paste mix. Cut out the bike and 2 wheels. Allow to dry completely (at least 24 hours). (PREPARE 24 HOURS IN ADVANCE)
TO MAKE THE CIRCLES
- Roll out green, red, orange, blue and yellow modelling paste. Cut out circles in each colour using the second largest circle with the circle tappit from the essential shapes set. Place the decorations to one side.
TO MAKE BUNTING
- Measure around the outside of the bottom tier and divide by 4. Place a
cocktail stick a small way in the cake all the way round. Knead a small amount of white fondant and place in the sugarcraft gun. Extrude the fondant from the gun through the disc. Drape the white fondant string over the cocktail sticks. Secure the fondant with water. Repeat this process for the top tier but divide by 3.
TO MAKE THE INSCRIPTION
- Roll out red modelling paste. Use the Art Deco set to cut out the inscription ‘FINISH’. Place to one side.
ASSEMBLING THE CAKE – (ATTACH DECORATIONS WITH WATER)
- Attach the cycle shirts, water bottles and gloves to the bunting strings on both tiers. Attach the small and large triangles.
- Attach the circle on the left hand side of the bottom tier and the bridge to the right hand side of the top tier.
- Attach the rectangles for the place signs.
- Attach a small cycle on the top and bottom tier.
- Attach the clouds on the top rim of the top and bottom tier. Attach 2 clouds to be used as hedges on the cake tiers.
- Attach road markings on the board and rim of the top of the bottom tier of the cake.
- Tie ribbon to the top of both lolly sticks. Attach a square to the back of the ribbon and then one on top of the front. Attach the letters to make the word ‘FINISH’. Refer to photo.
Push the lolly sticks in to the top of the cake to make a banner.
Attach the dry large cycle decoration to the top of the cake by securing to the finish banner with royal icing to support it.
Roll 2 balls of grey fondant and place on top of the lolly sticks.
Using the edible dusts mixed with clear alcohol or edible paint, colour in your decorations.
Once the circle and bridge are dry draw on the markings with edible pen. Write the place names London and Brighton with red edible pen on the rectangles.
Once all the decorations are dry use the black edible pen to highlight
corners, edges etc. Refer to cake photograph.

